Python with UV
There exists a Linux/MacOS version for this tool as well.
Installing UV in your system
We recommend using UV if you struggle with various python language versions and environments!
Open the Terminal app and type:
powershell -ExecutionPolicy ByPass -c "irm https://astral.sh/uv/install.ps1 | iex"
Next, download the Visual C++ Redistributable and install https://aka.ms/vs/17/release/vc_redist.x64.exe
And set the execution policy so that you can run your Python code:
Set-ExecutionPolicy -ExecutionPolicy Unrestricted -Scope CurrentUser
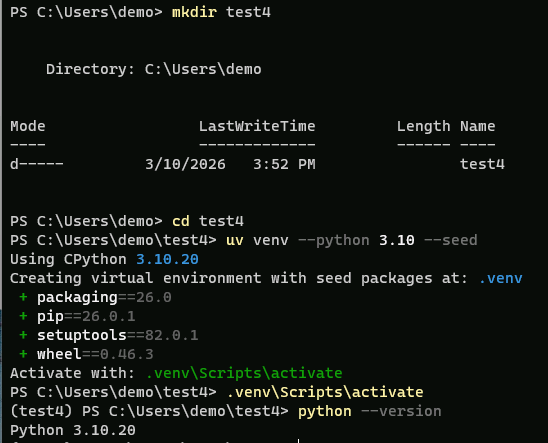
Make an environment with any python version you want
In this example we will install an older version python 3.10 to give you an idea of the possibility and make the environment in a directory called test, if you leave out –python 3.10 it will take the latest version:
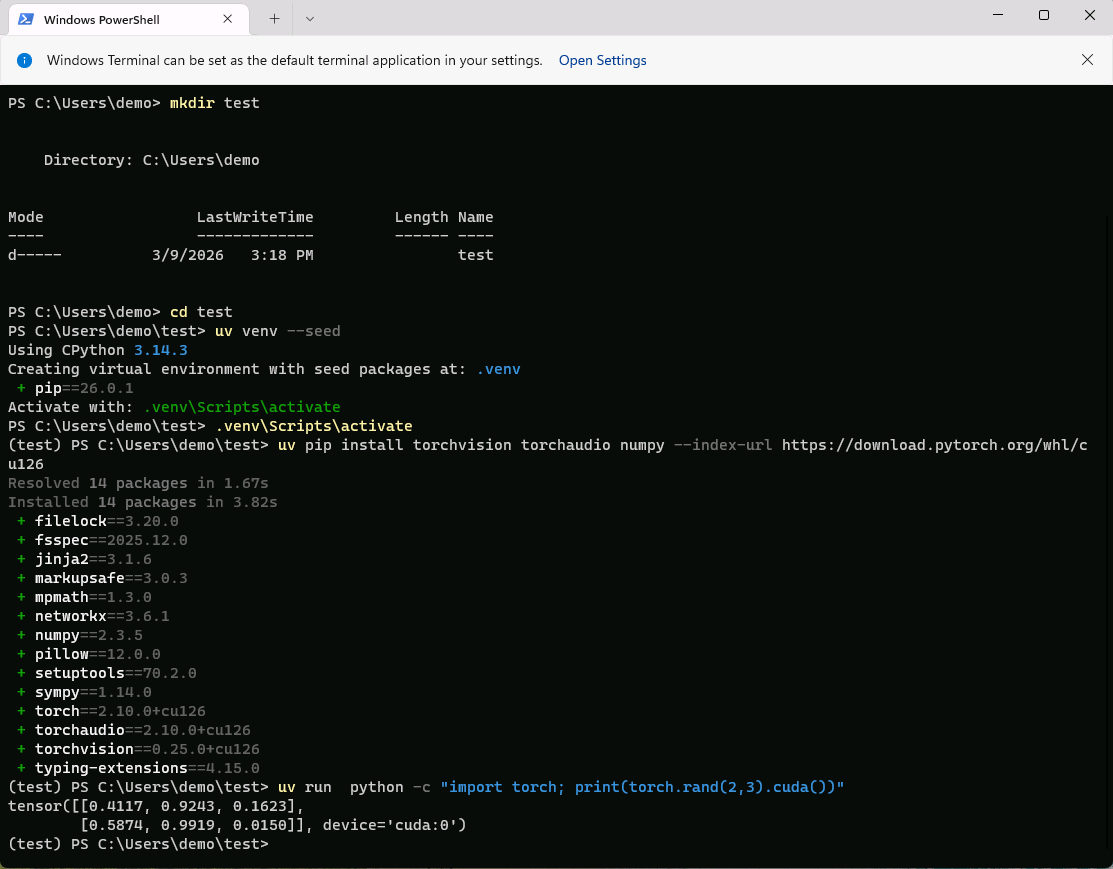
mkdir test
cd test
uv venv --python 3.10 --seed
To activate use:
.venv\Scripts\activate
check:
python --version
Install pytorch with cuda
As an example we will install Pytorch with CUDA capabilities! First check if you have a NVidia card, in the terminal typenvidia-smi.
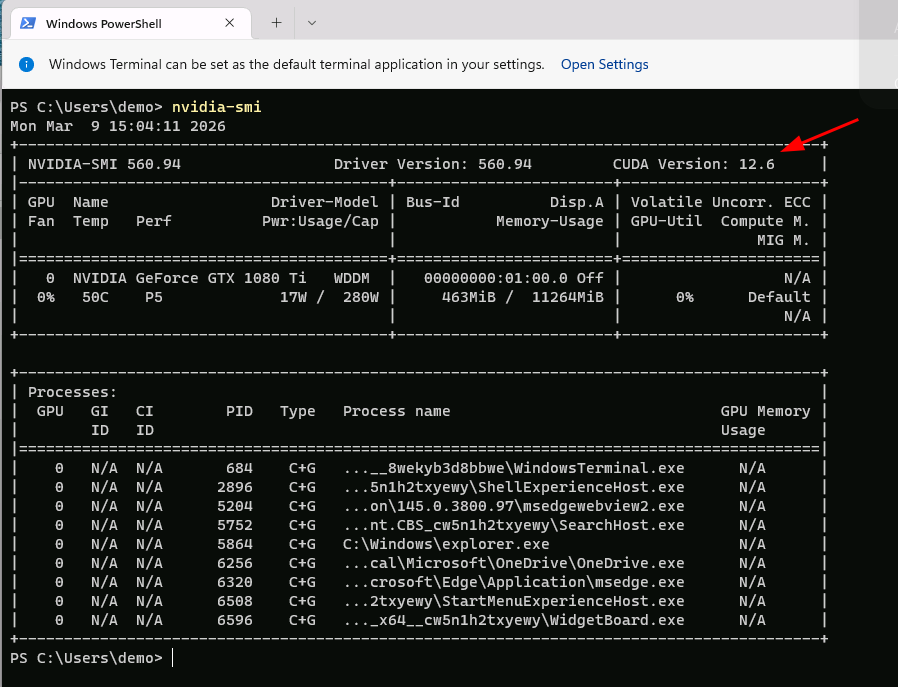 You can see the CUDA version in the upper right corner. You can also check and install a newer version on this link:
https://www.nvidia.com/en-us/drivers/ or more specific https://www.nvidia.com/en-us/geforce/drivers/.
You can see the CUDA version in the upper right corner. You can also check and install a newer version on this link:
https://www.nvidia.com/en-us/drivers/ or more specific https://www.nvidia.com/en-us/geforce/drivers/.
Adding Python packages for Pytorch
In this example we will install the Pytorch packages with CUDA 12.6 for fast GPU calculations:
uv pip install torch torchvision torchaudio numpy --torch-backend=cu126
This installs the CUDA 12.6 version that is still capable for the driver that was installed. You can also write –index-url https://download.pytorch.org/whl/cu126 instead of –torch-backend.
Test if cuda is recognized
Try this oneliner:
python -c "import torch; print(torch.cuda.device_count())"
If you get a tensor back, you are ready to go.
More info
The complete documentation can be found here: https://docs.astral.sh/uv/ and the command reference: https://docs.astral.sh/uv/reference/cli/.
Using UV and python virtual environments gives a lot of flexibility to maintain python in various projects.