TELIN S3 AWS Cloud Storage
As of now S3 is being phased out in favour of sftp.
Our TELIN fileservers use Minio S3 AWS cloud storage services to access data.
Examples:
Storage is connected through an access key, which routes to a directory in any filesystem. User permission can be given to have read-write, read-only, upload or download access.
The following client options are explained:
Browser
The browser gives easy access to your S3 storage.
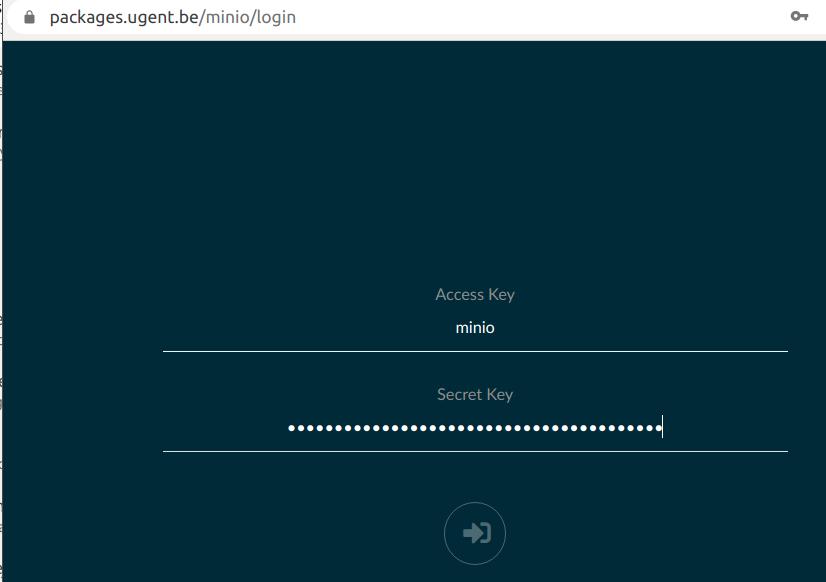
Login
Goto the URL and fill in the credentials that you have received from your sysadmin.
Download
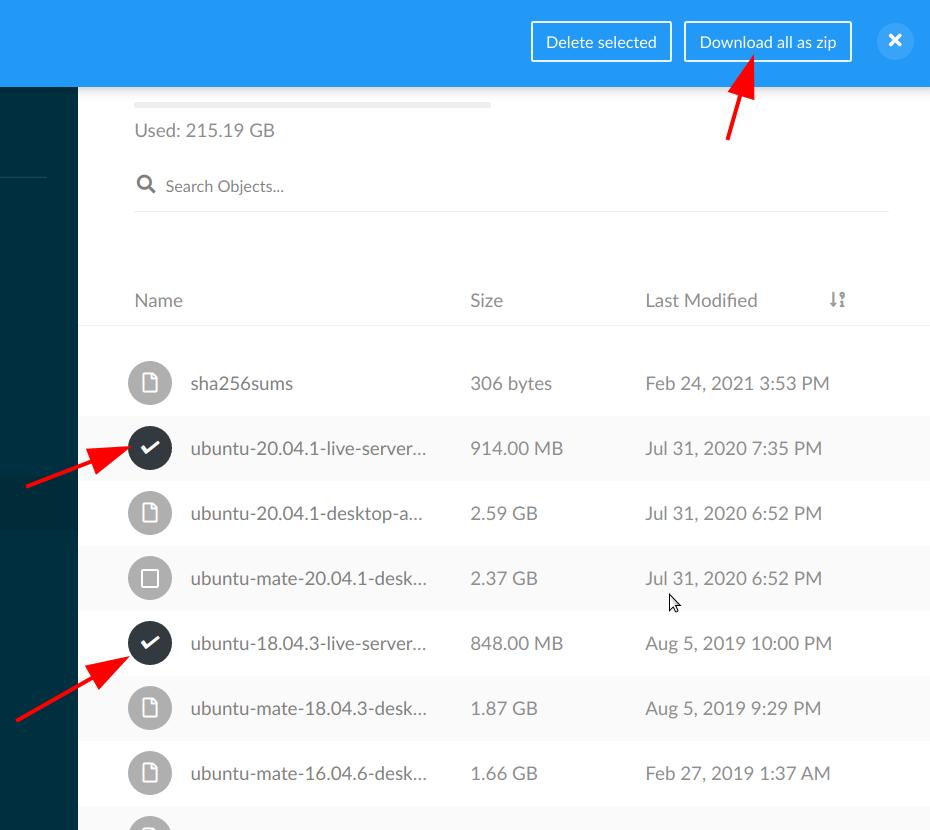
The arrows shows which area’s can be clicked. The + is for uploading if you have permission. The three dots … give you access to share, download and delete (if you have permission).

There is a special case if you long click on the round with an inside square next to the filename. This way you can select multiple files and download a Zip file. You only have to click on Download all as Zip, at first you think nothing happens, but in the background a zip file is created and downloaded! So, just wait if you have clicked and the joined files are being received.
Windows
Windows has a lot of choices:
Cyberduck
Cyberduck lets you not only connect to our SFTP servers, but can also connect to our S3 Cloud Storage.
Install
Goto the download section and install the Cyberduck application. Download by right-click this S3 (HTTPS) profile preconfigured settings, in Edge (Save target as). Once you downloaded this profile double-click or drag it into the main (bookmarks) window of the Cyberduck application.
The profile is derived from GenericS3profiles
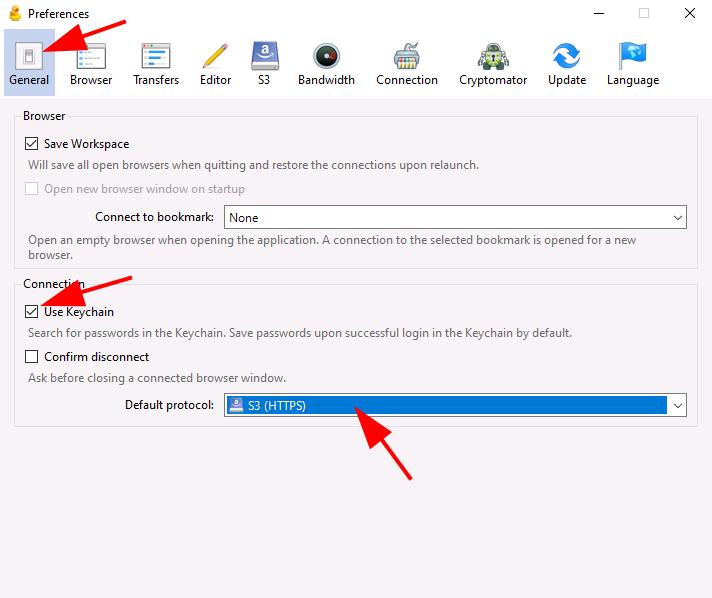
Preferences
Goto the preferences in tab General and select Use Keychain. This way you will be ably to save your secret keys. Select S3 (https) as default protocol.
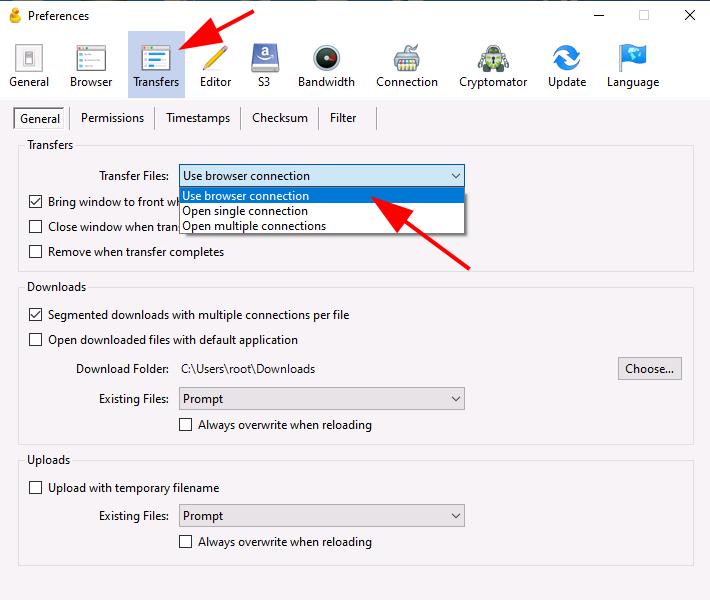
In the tab Transfers select Use browser connection.
Fill in the connection parameters
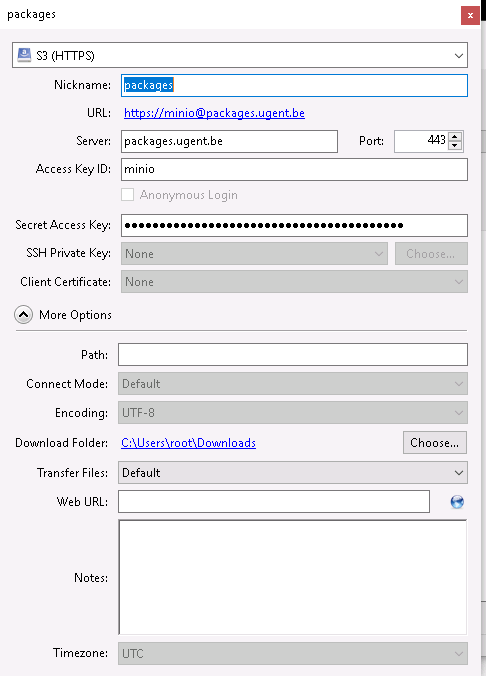
You can fill in the server and account parameters that you got from the Telin sysadmin or colleague.
- Make sure S3 (HTTPS) is selected
- Nickname
- Server
- Access Key
- Secret Access Key
Save it by closing the window (cross in right corner).
You can now connect to the Telin S3 Cloud Storage through the bookmark you just created.
WinSCP
WinSCP lets you not only connect to our SFTP servers, but can also connect to our S3 Cloud Storage.
Install
Goto the download and install the WinSCP application. Or if you have installed it already, check if it is a recent version that allows S3.
Launch
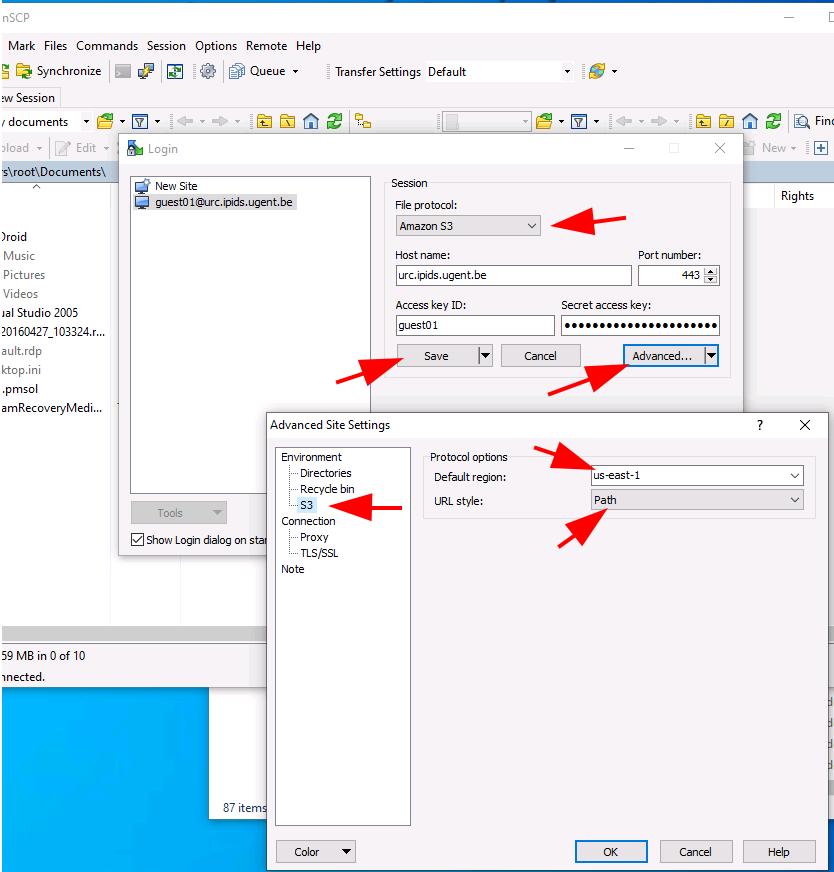
When you launch WinSCP a Login window pops up.
- Select Amazon S3 for File protocol
- Type the hostname you have received from your sysadmin, Port is 443
- Type the access and secret key you have received from your sysadmin
- Open Advanced
- Select the S3 menu on the left
- Set us-east-1 for Default region
- Set Path for URL style
- type OK and Save
You can now connect to the S3 storage with WinSCP.
S3 Browser
S3 browser is also available for connecting to the TELIN S3 Cloud storage.
Install
Goto the download and install the S3 Browser Freeware software.
Launch
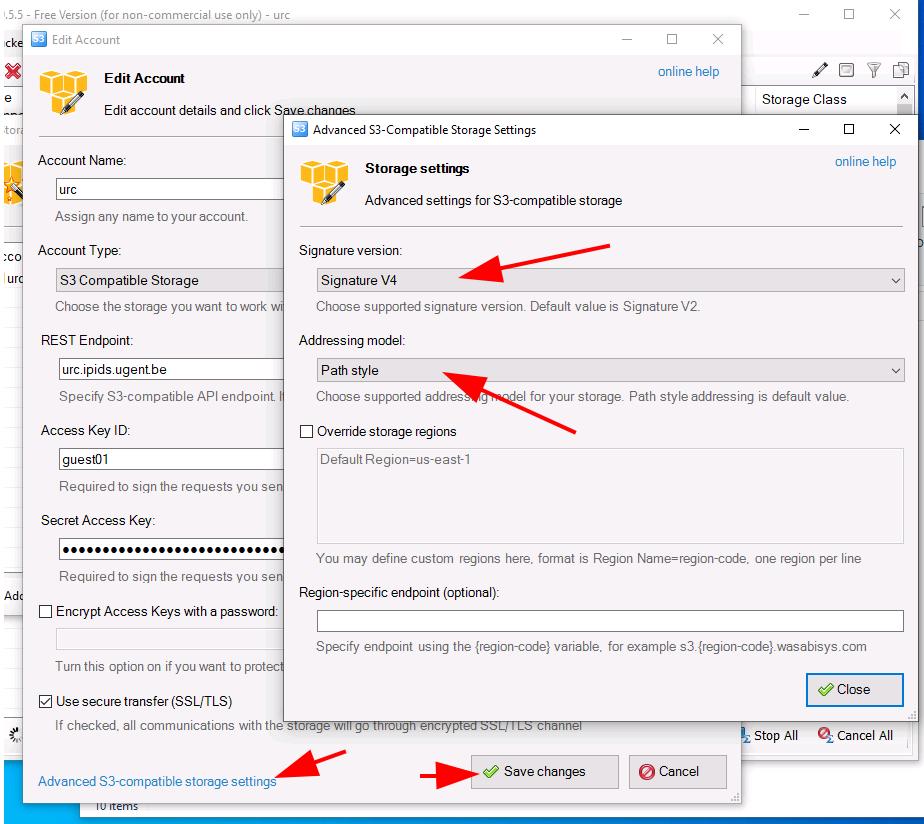
- Select New Account
- Type a nickname as an Account Name
- Select S3 Compatible Storage for the Account type
- Add the hostname you have received from your sysadmin as the REST Endpoint
- Type the access and secret key you have received from your sysadmin
- Check the Use secure transfer (SSL/TLS)
- Tick on the Advanced S3-compatible storage settings, a new windows will open
- Select Signature V4 and Path style as Adressing model
- Close and Save your changes
You can now connect to the S3 storage with S3 Browser.
Rclone and winFSP
This looks like the ultimate tool, connect a drive letter to your S3 storage!
Install
All files are in a zip file which can be run from the CMD terminal.
Locate the windows zip file in the releases. At the time of writing it is rclone-v1.61.1-windows-amd64.zip. Extract the files in your Desktop folder, so you can easily find it.
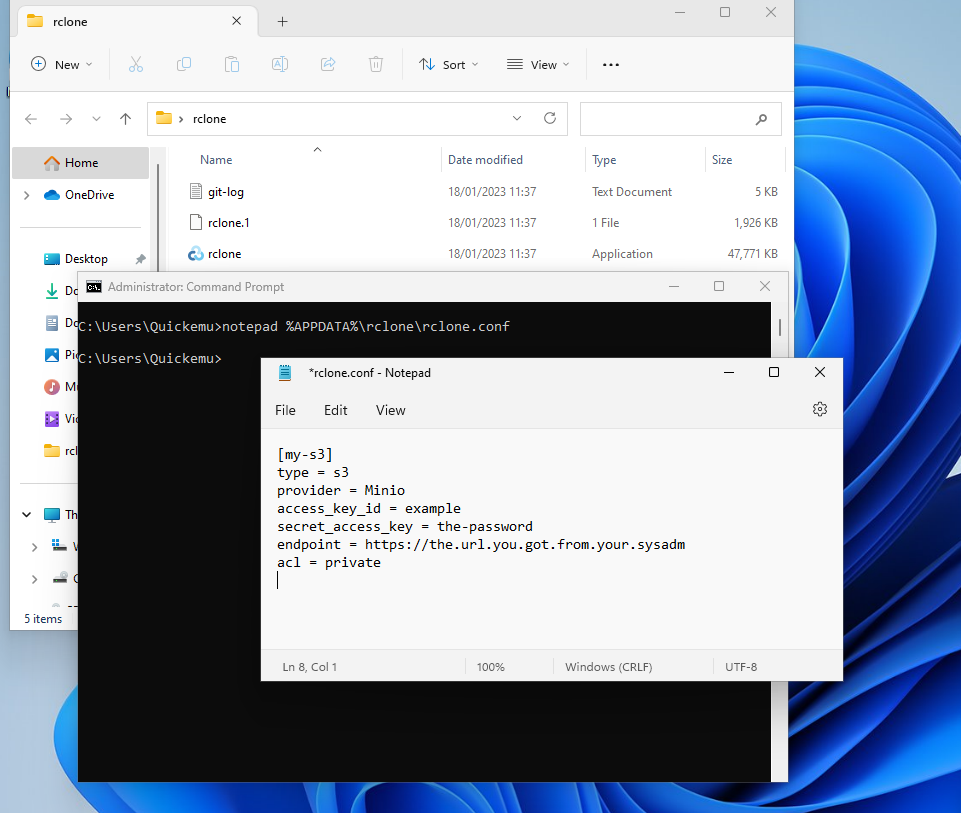
Open a CMD terminal via the windows Search bar and type the following:
mkdir %APPDATA%\rclone
notepad %APPDATA%\rclone\rclone.conf
and add the following into the rclone.conf file:
[my-s3]
type = s3
provider = Minio
access_key_id = minio-username
secret_access_key = minio-password
endpoint = https://s3-url
acl = private
replace minio-username, minio-password and s3-url with the credentials and URL you got from your sysadmin. Save and exit the notepad.exe app.
Now you should be able to access the S3 storage. Locate your extracted rclone directory, right click open in Terminal.
.\rclone ls my-s3:
If this works, you are ready to connect your S3 storage through a drive letter. Type the following in a your terminal.
winget install winfsp
.\rclone mount my-s3:bucket-name/ S: --vfs-cache-mode full
Replace bucket-name with the bucket name you got from your sysadmin. (You could change full to writes as a finer option).
Locate in the windows Explorer folder This PC and select the S: drive!
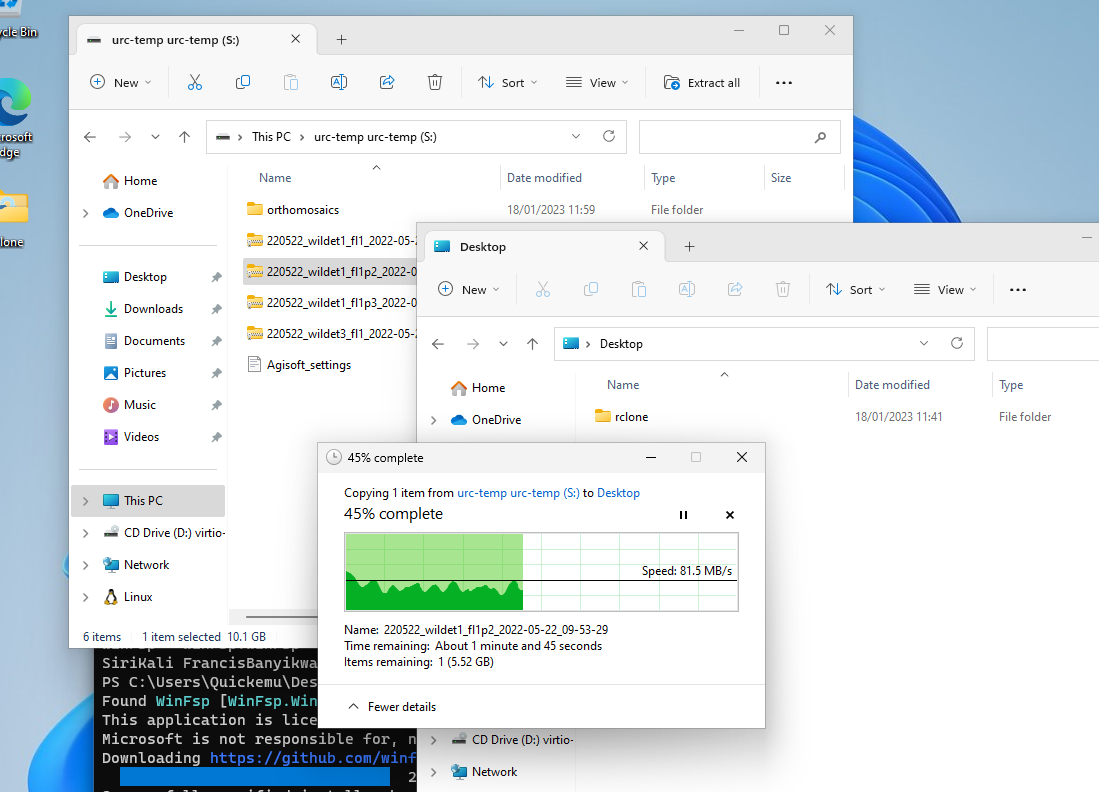
Now you can copy and paste your files and folders from another folder to your S3 storage.
MacOS
Users of MacOS can follow the guide from Cyberduck in Windows. The downloaded S3 (HTTPS) profile can be double clicked to make it active in Cyberduck!
Android
Install
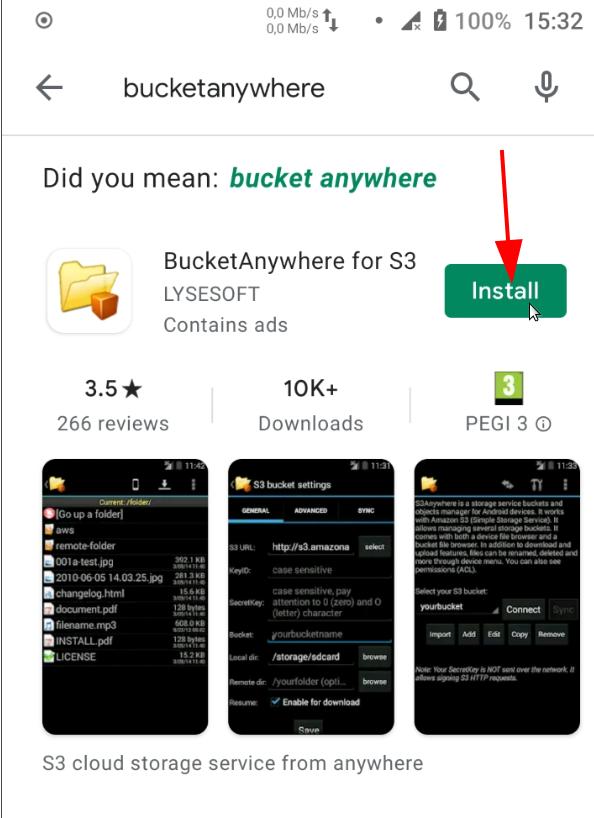
In the Google Play store search for bucketanywhere. You can find Bucketanywhere for S3 from the company Lysesoft. After install you can fill in the S3 connecton details.
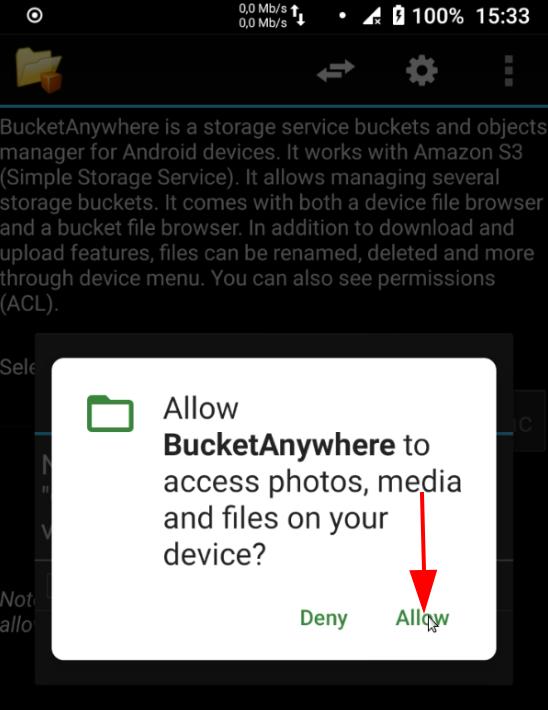
- Allow BucketAnywhere to access your device
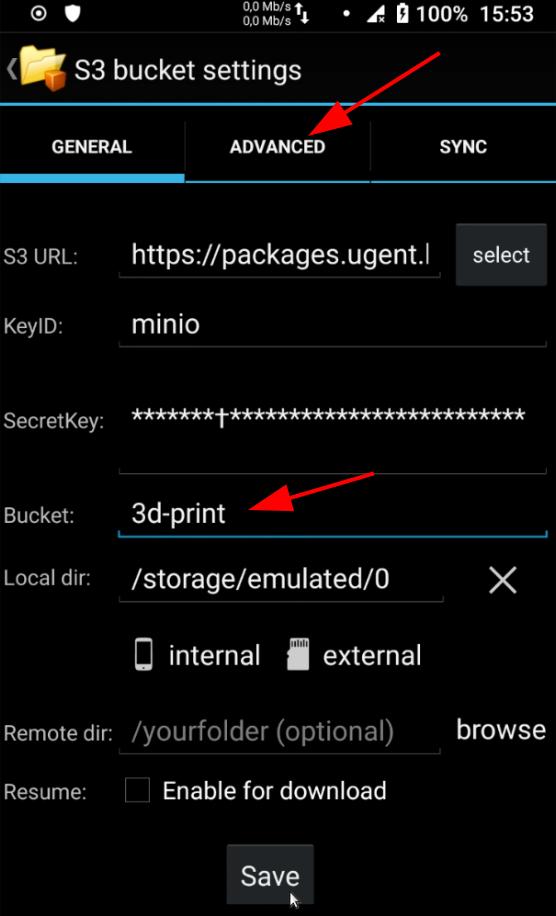
- In the General tab,
- Fill in S3 URL, KeyID and SecretKey given by your sysadmin
- A bucketname in the field Bucket is mandatory so, give one without any slashes
- You can select internal or external (sd-card) access
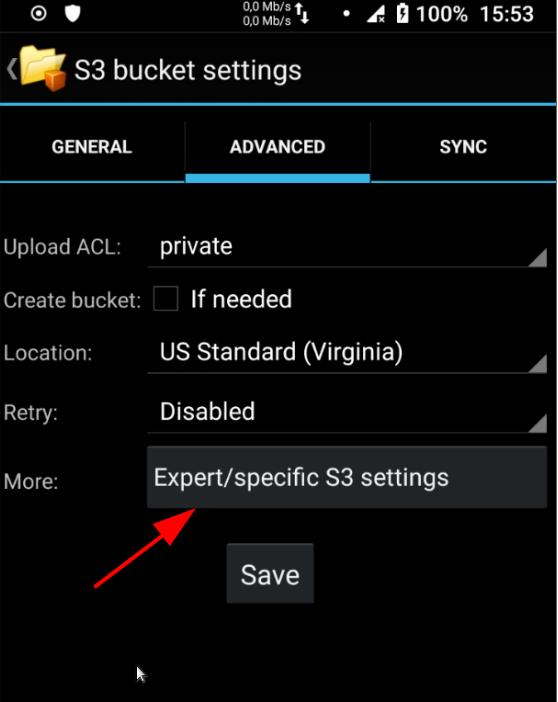
- Goto the Advanced tab
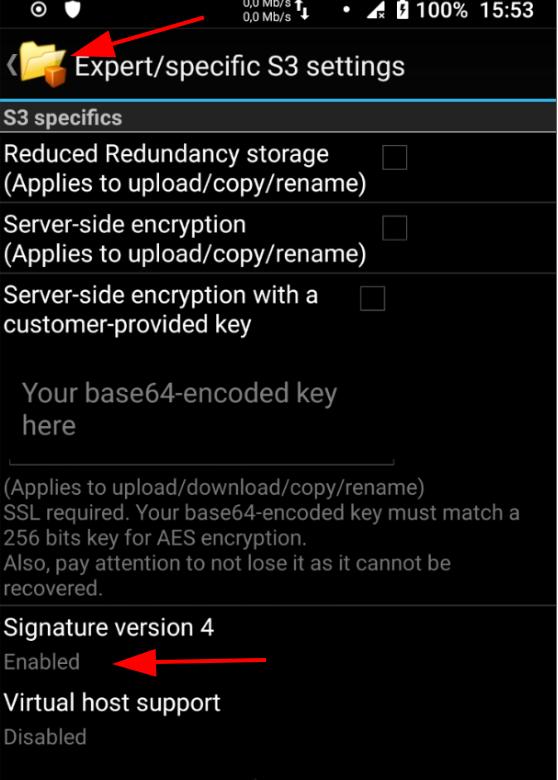
- Select Expert/specific S3 settings
- Enable Signature version 4
- click on BACK from your mobile device
- Save
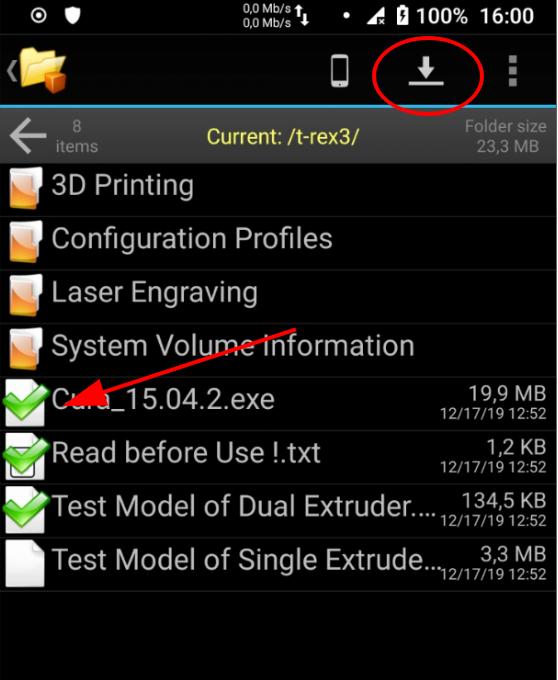
Download
You can browse the S3 storage now and select some files. The top right icon with the arrow down and a horizontal bar is for download.
Upload
If you tick on the smartphone icon, it becomes a cloud icon and you can upload from your mobile, if you have permission from the server.
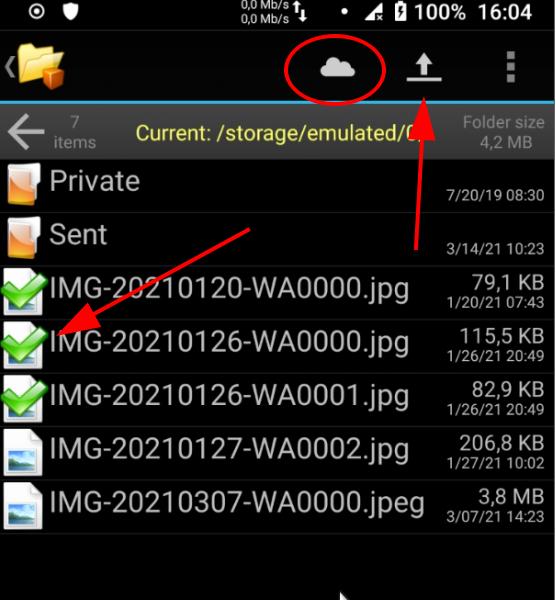
You can now work from your mobile with the S3 storage from TELIN. The app contains ads, so ignore the open at the bottom, or if you like it you can purchase it to get rid of the ads.
Command
Install
Download the mc client from Minio’s website.
- linux-amd64 is for Linux
- darwin-amd64 and darwin-arm64 is for MacOS
- windows-amd64 is for Windows
commands
Help
$ mc --help
Add host
mc alias set queenbee https://queenbee.ugent.be/ minio ****************
Get your URL and credentials from your sysadmin or colleagues.
Some examples
List
mc ls mys3
List bucket
mc ls mys3/mybucket
Copy from bucket (download)
mc cp mys3/mybucket/myfile .
Copy to bucket (upload)
mc cp myfile mys3/mybucket/
Delete from bucket
mc rm mys3/mybucket/myfile
The complete documentation can be found here
Python
Here is a little example to get you started in Python. First install the Minio Python module.
$ pip3 install --user minio
Example:
from minio import Minio
import io

# Create client with access and secret key.
# Connection details from your sysadmin or colleagues.
client = Minio("queenbee.ugent.be", "minio", "*******************************")

print('Making a bucket "mybucket" and writing text "Hello World!" to file "hello.txt".')
# Create bucket
if client.bucket_exists("mybucket"):
    print("Warning: mybucket exists")
else:
    print("Creating mybucket")
    client.make_bucket("mybucket")

# Upload data
result = client.put_object(
    "mybucket", "hello.txt", io.BytesIO(b"Hello World!"), 12,
)
print(
    "Created {0} object; etag: {1}, version-id: {2}".format(
        result.object_name, result.etag, result.version_id,
    ),
)

print('Reading 6 bytes with offset 6 from the "hello.txt" file')

# Download data
try:
    response = client.get_object(
        "mybucket", "hello.txt", offset=6, length=6,
    )
    # Read data from response.
    print("Welcome {0}".format(response.data.decode("utf-8")))
finally:
    response.close()
    response.release_conn()
More documentation can be found here.